The Death of the Physical Scout
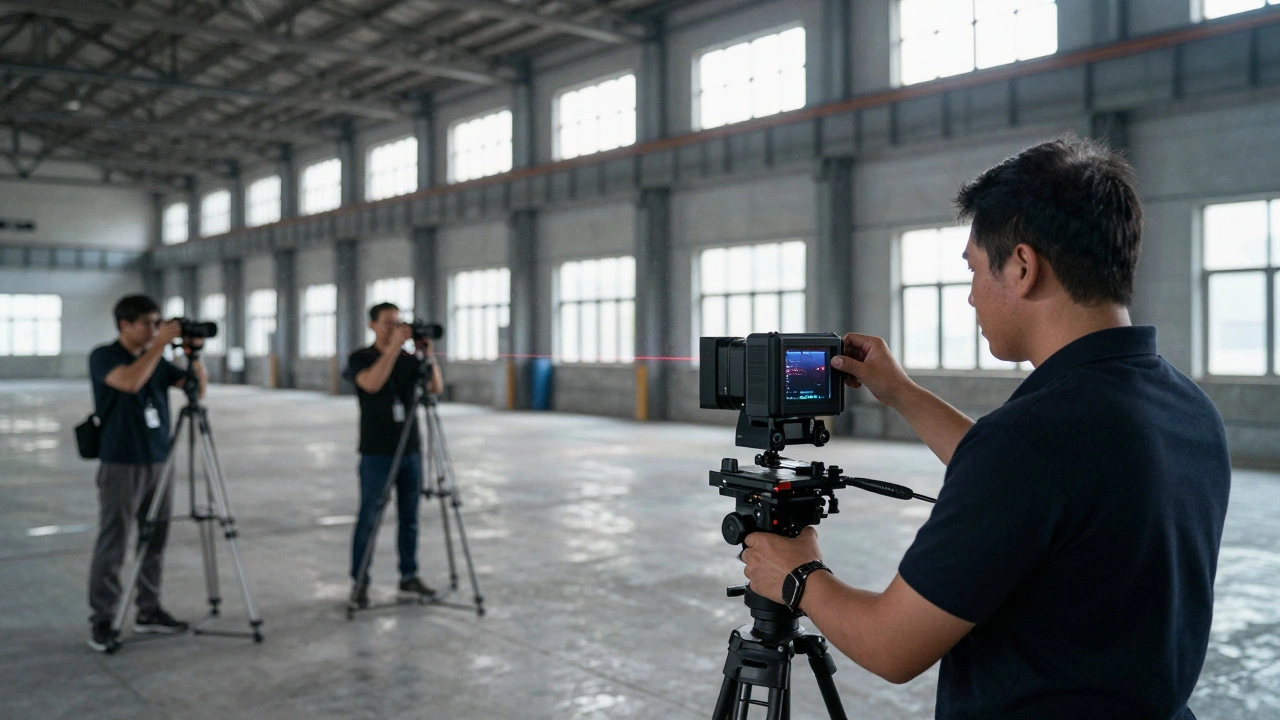
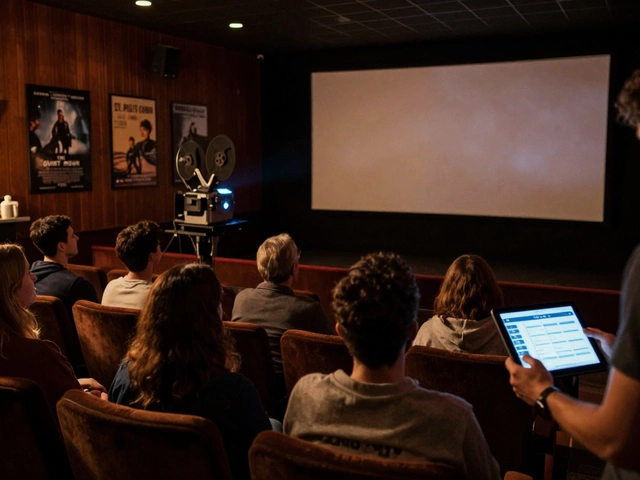
Remember when finding a location meant renting a van, driving six hours to a potential site, and hoping the light was right? That era is fading. Virtual scouting is the process of exploring and selecting filming locations using digital replicas rather than physical visits. It’s not just a convenience; it’s a necessity for modern productions that need to move fast and cut costs. By combining LIDAR (Light Detection and Ranging) with photogrammetry, you can build millimeter-accurate 3D environments. These assets then live inside Unreal Engine, where directors, cinematographers, and producers can walk through them together, anywhere in the world.
This isn't about replacing the final on-set experience. It's about making smarter decisions before you spend a single dollar on travel. You stop guessing if a room fits your camera rig. You stop wondering if the sunset hits the window at 4 PM or 6 PM. You know, because you’ve already simulated it.
Why Virtual Scouting Changes Pre-Production
The biggest win in virtual scouting is risk reduction. In traditional scouting, you commit time and money to visit sites that might be unusable due to noise restrictions, power limitations, or spatial constraints. With a digital twin, you identify these deal-breakers early. You can measure distances precisely without pulling out a tape measure. You can test lighting setups virtually before hiring the gaffer.
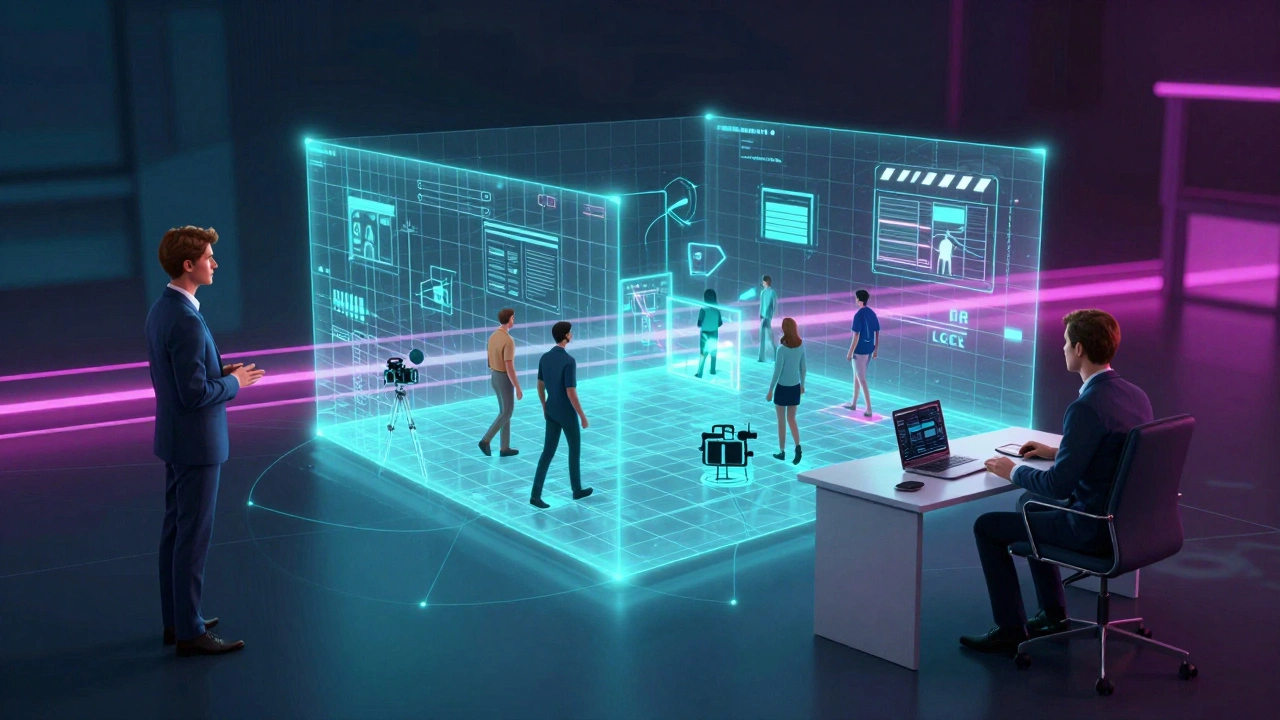
Consider the logistics of a global production. A director in Los Angeles, a producer in London, and a location manager in Prague don’t need to fly to the same city to agree on a site. They log into the same Unreal Engine session. They walk the set together via avatars. This collaboration saves thousands of dollars in flights and hotels alone. More importantly, it speeds up decision-making. You get consensus faster, which means you lock locations sooner, keeping the production schedule tight.
Furthermore, virtual scouting allows for creative experimentation. Want to see how the scene looks with a different color palette? Change it instantly. Want to add a CGI character to check scale? Drop them in. This level of flexibility encourages bold creative choices without the fear of costly mistakes.
Capturing Reality: LIDAR vs. Photogrammetry
To build a useful virtual scout, you need two types of data: geometry and texture. This is where LIDAR scanning and photogrammetry come in. They are complementary technologies, each solving half of the problem.
LIDAR uses laser pulses to map the shape of an environment. It shoots millions of beams per second and measures how long they take to return. The result is a "point cloud"-a precise 3D map of every surface. LIDAR is incredible for accuracy. It captures straight lines, corners, and architectural details perfectly. If you need to know exactly how wide a doorway is, LIDAR gives you that data down to the millimeter. It works well in low light and doesn't struggle with shadows. However, raw LIDAR data lacks color and texture. It looks like a wireframe model until you apply materials.
Photogrammetry, on the other hand, uses photos to reconstruct 3D models. You take hundreds of overlapping images of a space from different angles. Software analyzes the parallax between shots to calculate depth and generate a textured mesh. Photogrammetry provides rich, realistic textures. You see the grain of the wood, the cracks in the paint, and the dust on the floor. But it can struggle with featureless surfaces (like white walls) or reflective objects. It also requires good lighting conditions to capture accurate colors.
The best workflow combines both. Use LIDAR to get the perfect geometric skeleton. Then use photogrammetry to drape realistic textures over that skeleton. This hybrid approach ensures your virtual set is both dimensionally accurate and visually convincing.
| Feature | LIDAR | Photogrammetry |
|---|---|---|
| Primary Output | Point Cloud (Geometry) | Textured Mesh |
| Accuracy | Millimeter-level precision | Centimeter-level (varies by lighting) |
| Texture Quality | None (requires manual texturing) | High-resolution, photo-realistic |
| Lighting Dependence | Low (works in dark) | High (needs even, bright light) |
| Best For | Architectural structures, large spaces | Props, detailed sets, organic shapes |
Hardware Choices: What You Actually Need
You don’t need a million-dollar budget to start virtual scouting. The hardware landscape has democratized access significantly. For LIDAR, handheld scanners like the Matterport Pro2 or Leica RTC360 are industry standards. They’re fast, easy to operate, and produce clean point clouds. For smaller budgets, even iPhone Pro models with LiDAR sensors can capture decent indoor scans, though they lack the range and precision of dedicated units.
For photogrammetry, a high-quality mirrorless camera with a fixed focal length lens is ideal. Avoid zoom lenses to prevent distortion. A Sony Alpha series or Canon EOS R body paired with a 50mm or 85mm prime lens works well. You’ll also need a sturdy tripod to ensure consistent framing between shots. Smartphone apps like Polycam or RealityScan have improved dramatically, allowing quick captures for less critical areas, but dedicated cameras still yield superior results for film-grade visuals.
Processing power matters too. Stitching together thousands of photos or processing dense point clouds requires a robust workstation. Look for a PC with a strong multi-core CPU (like an Intel i9 or AMD Ryzen 9) and a powerful GPU (NVIDIA RTX 40-series). RAM is crucial-aim for at least 32GB, preferably 64GB, to handle large datasets without crashing.
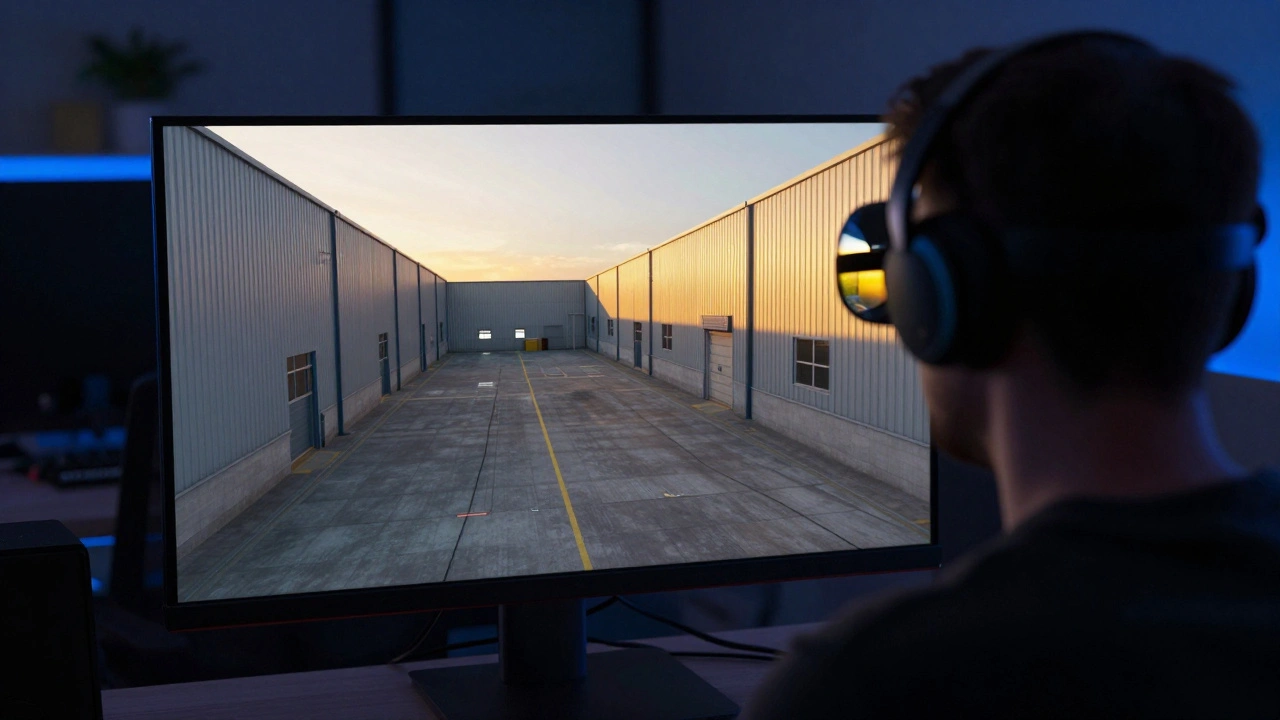
Bringing It All Together in Unreal Engine
Once you have your scanned data, you need a platform to view and manipulate it. Unreal Engine 5 has become the de facto standard for virtual production and scouting. Its real-time rendering capabilities allow you to navigate massive scenes without lag. Key features make it perfect for this workflow:
- Nanite: This virtualized geometry system lets you import highly detailed meshes directly from scans without worrying about polygon counts. You can walk through a scan with millions of polygons, and UE5 handles the optimization automatically.
- Lumen: Real-time global illumination simulates how light bounces off surfaces. When you place a virtual sun or studio lights in your scene, Lumen calculates reflections and shadows instantly. This helps cinematographers visualize lighting moods accurately.
- World Partition: Handles huge open-world maps by streaming only the necessary chunks of data. Essential for scanning entire neighborhoods or large studios.
The workflow typically involves importing your LIDAR point cloud into software like RealityCapture or Autodesk ReCap to convert it into a mesh. Then, you bring that mesh into Unreal Engine. Apply your photogrammetry textures. Set up the sky dome and basic lighting. Now you have a navigable environment.
Collaboration tools like Spatial or built-in Unreal Engine multiplayer features allow remote teams to join the scene. Directors can leave notes pinned to specific spots. Producers can highlight areas that need safety checks. Everyone sees the same reality, reducing miscommunication.
Practical Workflow: From Scan to Screen
Here’s a step-by-step guide to executing a virtual scout efficiently:
- Plan the Capture: Identify key angles and coverage areas. Ensure you have permission to scan. Check for Wi-Fi connectivity if using cloud-based processing.
- Execute LIDAR Scan: Place the scanner in central locations. Overlap scan positions by 30-50% to ensure seamless stitching. Keep the scanner level.
- Capture Photogrammetry Shots: Walk the space slowly, taking overlapping photos every few steps. Focus on textures, corners, and unique features. Maintain consistent exposure settings.
- Process Data: Import scans into processing software. Clean up noise and outliers. Generate a high-poly mesh. Bake textures if necessary.
- Import to Unreal Engine: Drag the asset into your project. Adjust scale and orientation. Apply materials.
- Light and Navigate: Add virtual lights to match natural conditions. Walk through the scene. Test camera movements.
- Collaborate: Share the link or host a session. Gather feedback from stakeholders.
This process takes time upfront, but it pays off during production. When you arrive on set, you already know where to place the camera, where the power outlets are, and how the light falls. You save hours of setup time.
Common Pitfalls and How to Avoid Them
Even with great tech, virtual scouting can go wrong. One common issue is "scan drift." If your LIDAR scans aren’t properly aligned, the final model might look warped. Always use control points or markers to anchor your scans. Another pitfall is poor texture resolution. If your photogrammetry photos are blurry or poorly lit, the virtual set will look muddy. Invest in good lighting equipment for your capture phase.
Don’t forget about audio. While visual fidelity is paramount, sound design is part of the location’s character. Record ambient noise during your scan. Import this audio into Unreal Engine so your team can hear the echo in a cathedral or the hum of traffic outside. This sensory detail adds another layer of realism to the scout.
Finally, manage expectations. A virtual scout is not a substitute for the final shot. It’s a planning tool. Lighting changes throughout the day. Weather affects visibility. People move around. Use the virtual model to make informed decisions, but stay flexible on shoot day.
Is virtual scouting cheaper than traditional scouting?
Yes, especially for distant or international locations. While there is an initial investment in hardware and software, you save significantly on travel, accommodation, and lost time. You eliminate the cost of visiting multiple unsuitable sites. For local shoots, the savings may be marginal, but the efficiency gains in pre-production planning often outweigh the costs.
Can I use my iPhone for professional virtual scouting?
You can, but with limitations. iPhones with LiDAR sensors (Pro models) are excellent for quick, small-scale indoor scans. They provide decent geometry and texture. However, for large outdoor spaces, complex architecture, or high-fidelity requirements, dedicated LIDAR scanners and DSLR/mirrorless cameras offer superior accuracy and resolution. Use your phone for rough drafts, not final deliverables.
How accurate is LIDAR for measuring set dimensions?
Professional LIDAR scanners are extremely accurate, often within millimeters. This precision is sufficient for determining if equipment fits in a space, calculating cable runs, and planning stunts. However, always verify critical measurements on-site before construction or major modifications. Digital models are guides, not legal blueprints.
Do I need to be a 3D artist to use Unreal Engine for scouting?
Not necessarily. Modern tools have simplified the workflow. Software like RealityCapture automates much of the mesh generation. Unreal Engine’s drag-and-drop interface makes importing assets straightforward. Basic navigation skills are enough to explore the scene. For advanced lighting and effects, some training helps, but many non-artists learn the essentials quickly through online tutorials.
What happens if the location changes after I scan it?
Locations change frequently. Furniture moves, renovations occur, weather alters exteriors. Your virtual model becomes outdated. To mitigate this, note the date of the scan prominently. Re-scan critical areas if significant changes occur. Treat the virtual scout as a snapshot in time, useful for planning but requiring verification upon arrival.


Comments(5)