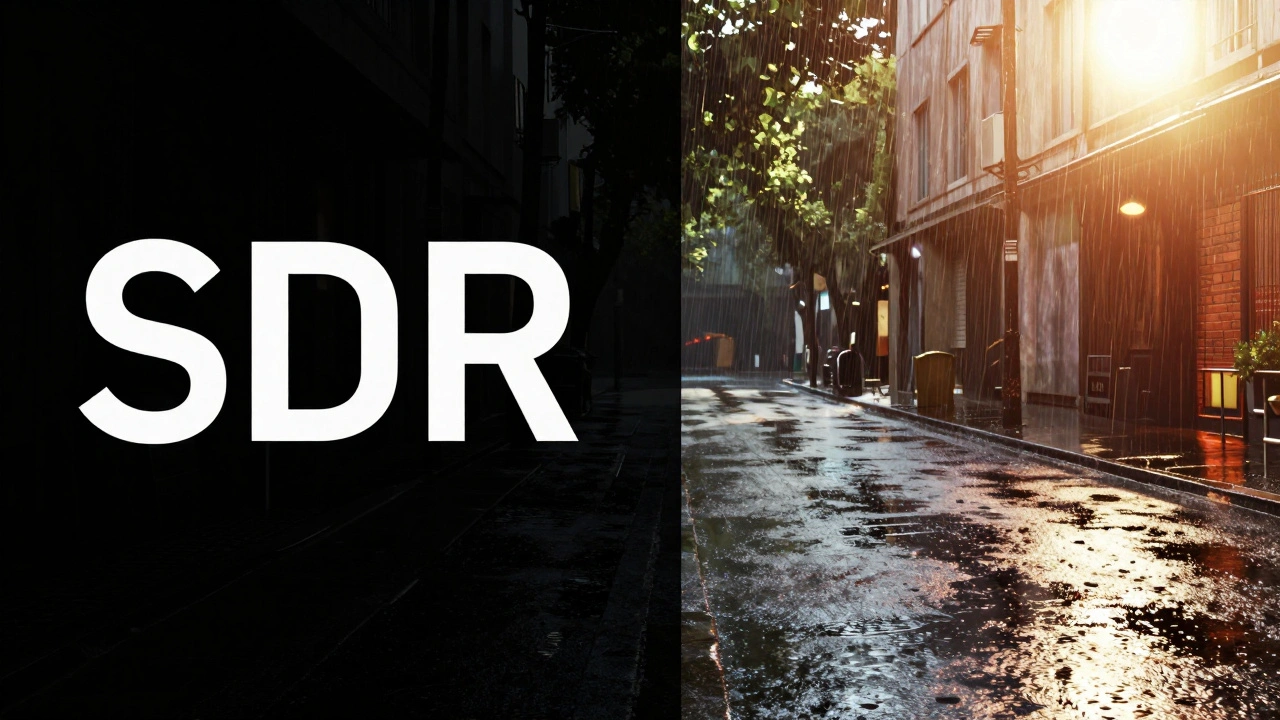
Imagine spending weeks perfecting a cinematic look, only to have it crushed flat or blown out when the film hits the big screen. This is the nightmare scenario for many colorists transitioning from standard dynamic range (SDR) to HDR color grading is the process of manipulating high-dynamic-range footage to create a visually stunning image with expanded contrast and color volume suitable for cinema releases. The stakes are higher than ever. Audiences expect that "wow" factor-the way sunlight glints off rain-slicked streets or how shadows retain detail in a dimly lit room.
Cinema releases add another layer of complexity. Unlike streaming platforms where you might grade for a living room TV, theatrical projection requires specific mastering standards that balance brilliance with subtlety. If you get the workflow wrong, your film could look inconsistent across different venues or fail quality control checks entirely. Let’s break down exactly how to navigate this terrain without losing your mind-or your image.
The Core Difference: Why HDR Changes Everything
To understand HDR color grading is a technical and artistic discipline focused on managing extreme luminance levels and wide color gamuts, you first need to grasp why it feels so different from SDR. In traditional Rec.709 workflows, you’re working within a narrow box. Highlights clip at 100 nits, and shadows bottom out quickly. It’s like painting with a limited palette.
HDR throws that box away. You’re now dealing with peak brightnesses ranging from 1,000 to 4,000 nits and beyond. But here’s the catch: human vision adapts. Your eyes adjust to bright light by becoming less sensitive to contrast. This means you can’t just push sliders up until things look bright; you have to manage perceptual quantization (PQ).
In cinema, this translates to using specific transfer functions like SMPTE ST 2084 is the standard electro-optical transfer function used for HDR content, defining how digital values map to display luminance. This ensures that the data you send to the projector matches what the audience sees. Without understanding PQ, your grades will look linear and lifeless on calibrated displays.
Building a Robust HDR Workflow
A solid workflow starts before you even open your grading software. It begins on set. If you’re shooting Log or RAW formats, you’re capturing the maximum amount of information. But not all Log curves are created equal for HDR. Some are designed specifically for SDR conversion and compress highlights too aggressively for HDR purposes.
- Shoot Wide Gamut: Use cameras capable of recording in Rec.2020 is a wide color gamut standard that encompasses nearly all colors visible to the human eye, essential for HDR production. This gives you the flexibility to expand colors later without introducing banding or artifacts.
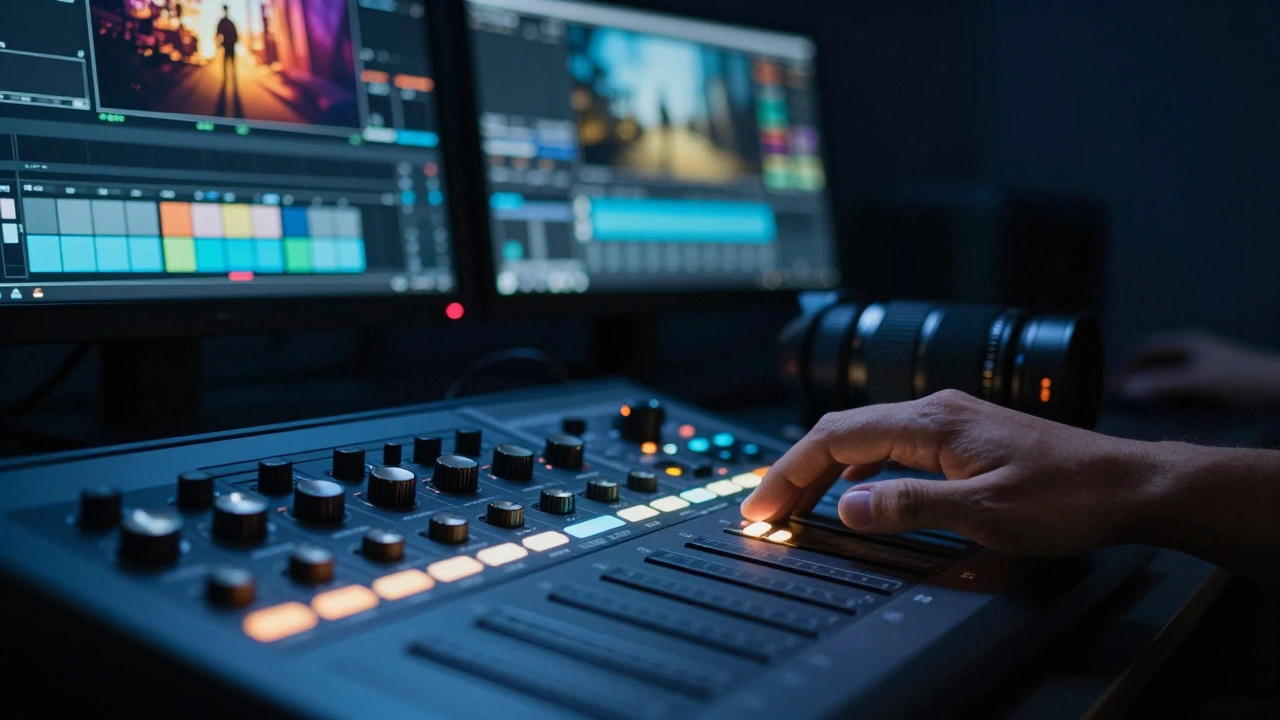
- Monitor Accurately: You cannot grade what you cannot see. Invest in a reference-grade monitor that supports at least 1,000 nits peak brightness and covers over 95% of Rec.2020. Brands like Sony BVM series or Canon Cinema RGB are industry staples.
- Calibrate Regularly: HDR monitors drift. Calibrate them weekly using tools like Light Illusion Spectrum or Klein K-10. A misaligned monitor leads to bad decisions, especially in shadow details.
Once you’re in post, organize your media carefully. HDR files are large. A single minute of 6K RAW footage can take up terabytes. Ensure your storage system has enough bandwidth to handle real-time playback. Laggy playback kills creativity because you lose the emotional connection to the scene while tweaking knobs.
Common Pitfalls That Ruin HDR Grades
Even experienced colorists stumble into traps when moving to HDR. Here are the most common ones I’ve seen-and how to avoid them.
- Over-Contrasting: It’s tempting to crush blacks and blow out whites to make the image pop. However, cinema projectors vary in capability. If you hard-code extreme contrasts, you risk clipping important details on lower-end installations. Aim for a natural dynamic range that preserves texture in both shadows and highlights.
- Ignoring Tone Mapping: Many projects require multiple deliverables: one for Dolby Cinema, one for IMAX, and perhaps an SDR version for international markets. Failing to plan for tone mapping early means re-doing work later. Use node-based structures that isolate tone mapping from creative adjustments.
- Color Banding: HDR amplifies compression artifacts. If your codec isn’t robust enough, you’ll see ugly bands in gradients, especially in skies or smooth skin tones. Shoot with higher bit depths (10-bit or 12-bit minimum) and use dithering during export if necessary.
Another subtle trap is relying solely on scopes. While waveforms and vectorscopes are crucial, they don’t tell the whole story in HDR. Our eyes perceive contrast differently at high luminance levels. Always cross-reference technical measurements with visual inspection on a calibrated monitor.
Cinema-Specific Mastering Standards
When targeting theatrical release, you’re playing by stricter rules than streaming. Different exhibition technologies demand different masters. Understanding these distinctions is critical for a successful launch.
| Format | Peak Brightness | Color Space | Metadata Type | Best For |
|---|---|---|---|---|
| Dolby Vision is a proprietary HDR format developed by Dolby Laboratories, known for its advanced scene-by-scene metadata capabilities. | Up to 10,000 nits | Rec.2020 | Dynamic Metadata | Premium Dolby Cinema screens |
| IMAX Enhanced is a specification for home theater systems that mimics the IMAX experience, often requiring specific HDR settings. | Variable (often 4,000+) | Rec.2020 | Static/Dynamic Hybrid | IMAX Laser auditoriums |
| DCI-P3 is a color space standard used in digital cinema, serving as the baseline for many HDR conversions. | 48 nits (SDR baseline) | DCI-P3 | N/A | Standard digital projection |
Dolby Vision stands out because of its dynamic metadata. Unlike static HDR formats that apply one tone curve to the entire movie, Dolby Vision allows you to adjust exposure and color balance on a per-frame or per-shot basis. This is powerful but demanding. You need specialized software plugins and often a dedicated session with Dolby engineers to finalize your master.
For IMAX, the challenge lies in maintaining clarity across massive screens. Artifacts that are invisible on a 65-inch TV become glaring issues on a 40-foot canvas. Pay extra attention to noise reduction and sharpening. Over-sharpening creates halos around edges, which distract viewers in large formats.

Practical Tips for Smoother Grading Sessions
Grading in HDR is mentally taxing. Your eyes fatigue faster because they’re constantly adapting to brighter images. Here are some practical strategies to keep your sessions efficient and accurate.
Take frequent breaks. Step away from the suite every hour. Look at something neutral-white walls or daylight-to reset your cone cells. Coming back with fresh eyes helps you spot inconsistencies you missed earlier.
Use LUTs wisely. Don’t rely on generic Rec.709 LUTs for monitoring. Create custom viewing LUTs that map your HDR workspace to your monitor’s capabilities accurately. This ensures that what you see is a true representation of the final output, not a distorted approximation.
Collaborate early. Bring the director and cinematographer into the grading room. Explain the limitations and possibilities of HDR. Sometimes, what looks great on set doesn’t translate well to HDR due to lighting ratios. Adjustments made during prep can save hours in post.
Finally, document everything. Save your project files with clear naming conventions. Note any specific settings used for different deliverables. When you return to a project months later for a festival cut or international release, having detailed records prevents guesswork and errors.
Frequently Asked Questions
What is the difference between HDR and SDR color grading?
SDR (Standard Dynamic Range) uses a limited contrast ratio and narrower color gamut (Rec.709), typically peaking at 100 nits. HDR (High Dynamic Range) offers significantly higher contrast ratios, wider color gamuts (Rec.2020), and much higher peak brightness (1,000-10,000+ nits). HDR grading requires managing perceptual quantization and often involves dynamic metadata to preserve detail in both very bright and very dark areas simultaneously.
Do I need special equipment to grade HDR for cinema?
Yes. Standard consumer monitors cannot accurately display HDR content. You need a reference-grade monitor capable of at least 1,000 nits peak brightness and covering a significant portion of the Rec.2020 color space. Additionally, you’ll need calibration tools like spectroradiometers to ensure your monitor remains accurate over time. Software should also support HDR workflows natively.
How does Dolby Vision differ from other HDR formats?
Dolby Vision uses dynamic metadata, which allows for frame-by-frame or shot-by-shot adjustments to brightness and color. Other formats like HDR10 use static metadata, applying a single tone curve to the entire piece of content. This makes Dolby Vision more flexible and precise, ensuring optimal presentation across various display types, but it requires specialized encoding and licensing.
What causes banding in HDR footage?
Banding occurs when there aren't enough bits of data to represent smooth transitions between shades, particularly in gradients like skies or shadows. HDR exaggerates these issues because the dynamic range is so vast. To prevent banding, shoot in 10-bit or higher resolution, use codecs that support high bit-depths, and apply dithering during the export process if necessary.
Can I grade HDR footage on an SDR monitor?
While possible, it is highly discouraged for professional cinema releases. Grading on an SDR monitor means you are blind to the full range of highlights and shadows available in HDR. You may accidentally clip important details or create unnatural contrasts. At minimum, use a secondary HDR reference monitor alongside your primary SDR setup to check critical shots.
What is SMPTE ST 2084?
SMPTE ST 2084, also known as Perceptual Quantizer (PQ), is the standard electro-optical transfer function used for HDR content. It defines how digital signal values correspond to actual display luminance. By using PQ, creators ensure that their content appears consistent across different HDR displays, preserving the intended artistic vision regardless of the hardware.
How do I prepare my project for multiple cinema formats?
Start by grading in a universal HDR workspace (like ACES or native camera Log mapped to Rec.2020/PQ). From this master grade, create separate deliverables using tone-mapping nodes tailored to each format (Dolby Vision, IMAX, etc.). Keep your creative adjustments isolated from the technical tone-mapping steps so you can easily swap out outputs without redoing the artistic work.