Imagine a crowded room. Hundreds of people are talking, moving, and laughing. Now imagine that every single person is sharp, clear, and equally visible. It’s chaotic, right? Your eyes don’t know where to look. In cinema, we don’t want chaos. We want control. We want the audience to feel exactly what the protagonist feels, see exactly what they notice, and ignore everything else.
This control comes down to two technical tools: Depth of Field and focus. These aren’t just camera settings; they are narrative devices. When you manipulate them correctly, you guide the viewer’s eye without saying a word. You create intimacy, tension, or confusion on purpose. Let’s break down how to use these tools to direct attention effectively in your films.
The Psychology of Selective Vision
Human vision naturally seeks contrast and clarity. When something is sharp, our brains register it as important. When something is blurry, we subconsciously categorize it as background noise. Cinematography exploits this biological instinct.
Selective focus is the technique of keeping only a specific part of the frame in sharp focus while rendering other areas blurred. This forces the viewer to look where you want them to look. If a character is lying, and you keep their face sharp but blur the truthful friend standing next to them, you visually isolate the liar. The audience feels the isolation before the dialogue even confirms it.
Conversely, when everything is in focus-known as deep focus-you force the audience to make choices. They have to scan the frame. This creates a sense of realism or complexity. Think about Alfred Hitchcock’s famous shot in Rope, where the murder happens in the background while guests chat in the foreground, all in sharp focus. The horror isn’t just in the act; it’s in the banality of the surrounding life continuing uninterrupted.
Understanding Depth of Field Variables
To control depth of field (DoF), you need to understand the three main variables that affect it. You can’t guess; you have to calculate or visualize these relationships.
- Aperture: This is the most common lever. A wide aperture (low f-stop number like f/1.4) creates a shallow depth of field. Only a thin slice of the image is sharp. A narrow aperture (high f-stop number like f/8 or f/16) creates a deep depth of field, keeping everything from near to far sharp.
- Focal Length: Longer lenses (telephoto) compress space and reduce depth of field. A 85mm lens at f/2.0 will blur the background much more aggressively than a 35mm lens at the same aperture. Wide-angle lenses tend to keep more of the scene in focus.
- Distance to Subject: The closer the camera is to the subject, the shallower the depth of field. If you move the camera back, the zone of sharpness expands.
Here is a quick reference for how these variables interact:
| Variable | Action | Effect on Depth of Field | Narrative Impact |
|---|---|---|---|
| Aperture | Open wider (lower f-stop) | Shallower (more blur) | Isolation, intimacy, dreaminess |
| Aperture | Close down (higher f-stop) | Deeper (less blur) | Context, realism, epic scale |
| Lens | Use longer focal length | Shallower | Compression, intensity |
| Lens | Use shorter focal length | Deeper | Environmental awareness |
| Camera Distance | Move closer to subject | Shallower | Subjective perspective |
| Camera Distance | Move away from subject | Deeper | Objective observation |
Shallow Depth of Field: Isolation and Emotion
Shallow depth of field is the go-to tool for emotional close-ups. When you shoot a character’s face with a fast prime lens, say a 50mm at f/1.8, the background melts into soft bokeh. This visual separation tells the audience, "This character’s internal state is more important than their environment right now."
This technique works exceptionally well in romantic dramas or intense psychological moments. It mimics tunnel vision. When we fall in love or experience trauma, our world narrows. Shallow DoF replicates that physiological response.
However, be careful not to overuse it. If every shot is a blurry mess, the audience loses spatial context. They stop knowing where characters are in relation to each other. Use shallow DoF strategically. Save it for the moments when the emotion needs to peak.
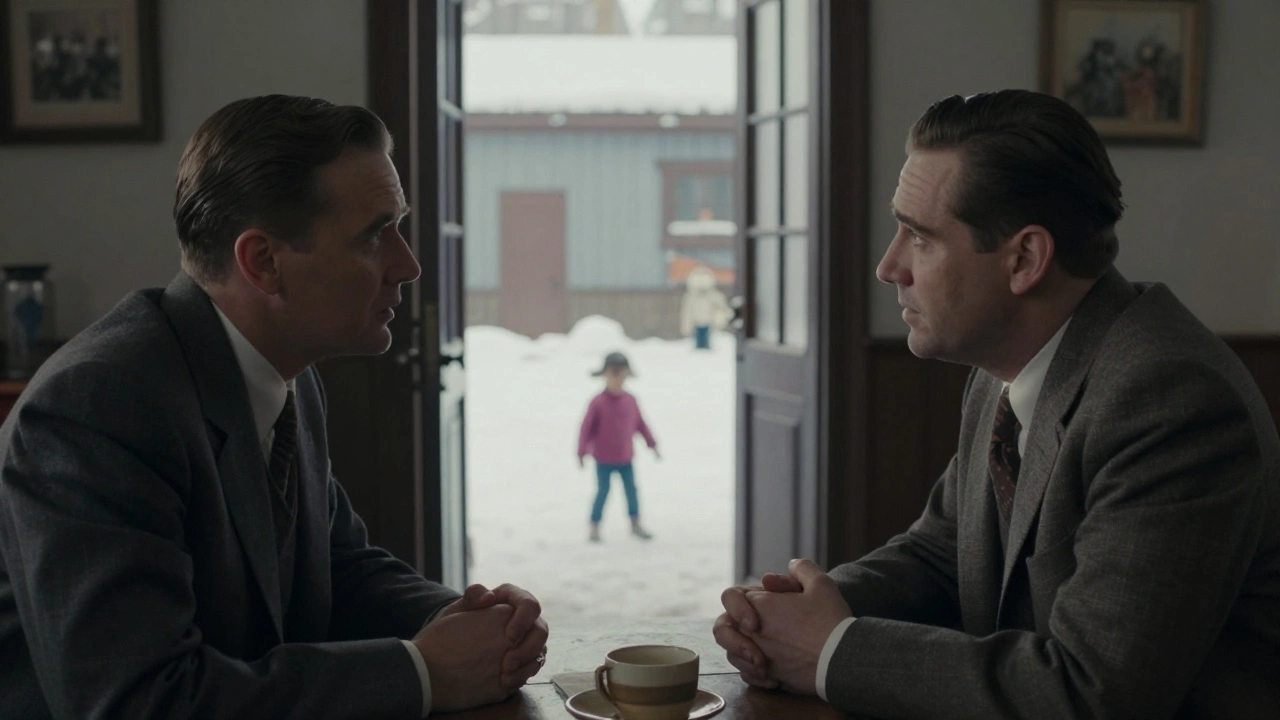
Deep Focus: Context and Power Dynamics
Deep focus requires more discipline. You’re forcing the audience to look at multiple planes of action simultaneously. This is powerful for establishing power dynamics or showing cause and effect.
In Orson Welles’ Citizen Kane, deep focus is used to show young Kane playing in the snow outside while adults discuss his future inside the house. Both actions are equally sharp. The audience sees the connection between the innocent child and the cynical negotiation happening indoors. You don’t need to cut between them; the relationship exists in the same frame.
To achieve true deep focus, especially with large format cameras or anamorphic lenses, you often need smaller apertures. This means you need more light. If you’re shooting on location, you might need large LED panels or HMI lights to stop down to f/8 or f/11. Plan your lighting accordingly.
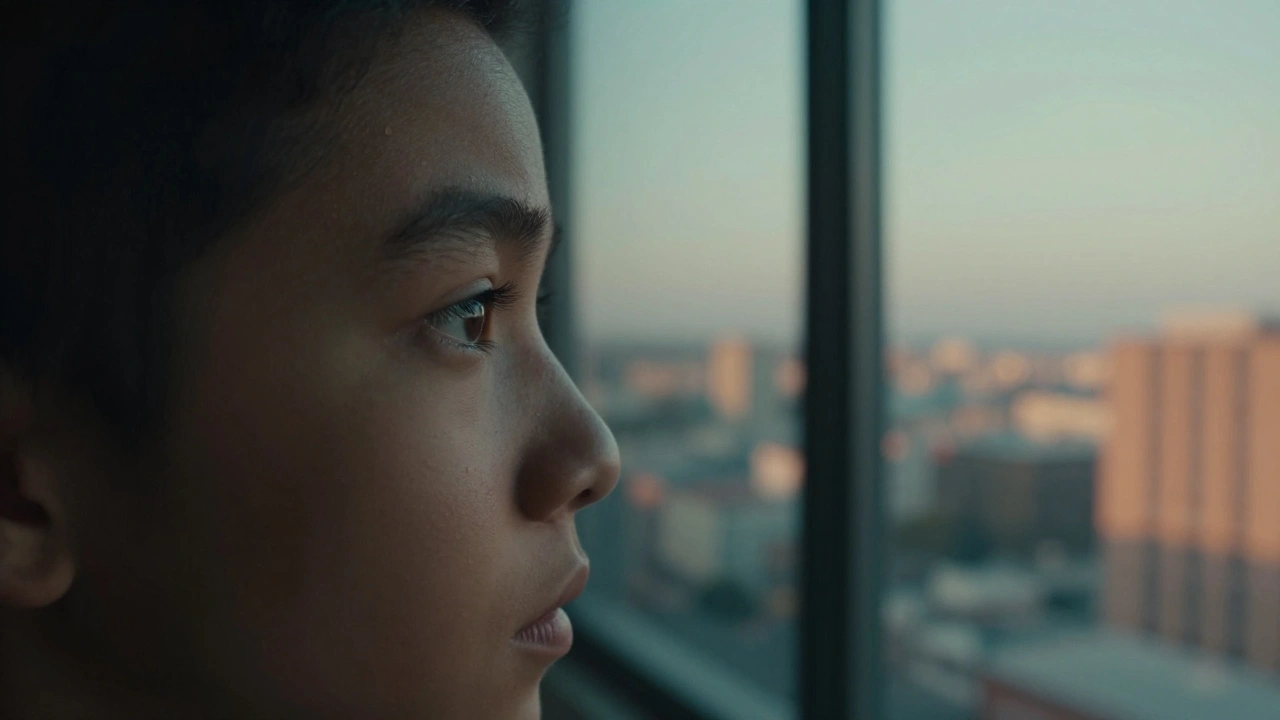
Rack Focus: Guiding the Eye in Real-Time
Rack focus is a cinematic technique where the focus shifts from one subject to another during a shot. This is one of the most direct ways to tell the audience, "Stop looking there, look here instead."
A classic example is a character looking out a window. The shot starts focused on their face, then the focus pulls to the object outside the window that they are seeing. This connects the character’s reaction to the stimulus without cutting. It maintains continuity and time.
For a successful rack focus, timing is everything. The focus pull should match the speed of the character’s head turn or eye movement. If the focus changes too fast, it looks jarring. Too slow, and it drags. Practice with your focus puller. Mark your distances clearly. Use follow focus systems with precise gearing. Modern digital monitors with peaking aids help, but muscle memory and communication are still key.
Common Mistakes to Avoid
Even experienced filmmakers fall into traps with depth of field. Here are the most common errors:
- Blurring by accident: Sometimes you want a shallow DoF, but you end up blurring the wrong thing. Always check your critical focus point. Is it the eyes? Usually, yes. If the iris is soft, the shot fails.
- Ignoring the background: Even if the background is out of focus, it still affects the image. Bright lights in the background can create distracting flares or blow out highlights. Dark backgrounds can swallow the subject. Choose your background carefully, even if it’s blurry.
- Overusing bokeh: Beautiful circular highlights are trendy, but they can date your film quickly. Ask yourself: does this blur serve the story, or does it just look pretty? If it’s just pretty, consider stopping down.
- Inconsistent focus across cuts: If you cut from a wide shot to a close-up, ensure the depth of field feels consistent unless you intend a shift in perspective. Mismatched DoF can make the edit feel disjointed.
Practical Workflow for On-Set Focus
Getting focus right on set involves preparation and execution. Here is a streamlined workflow:
- Pre-focusing: Before rolling, mark your tape measures. Measure the distance from the sensor plane (not the front of the lens) to the subject’s eyes. Input this into your follow focus unit.
- Communication: Establish hand signals or radio protocols with your focus puller. Clear cues prevent hesitation.
- Monitor Check: Use a high-resolution monitor with focus peaking enabled. Peaking outlines edges in red or green, helping you see what’s sharp even in low light.
- Rehearsal: Run the scene with focus pulls before filming. Actors move differently during takes. Adjust your marks based on their actual performance.
- Safety Margin: If you’re unsure, stop down slightly. It’s better to have slightly more depth of field than to miss focus entirely. You can always add blur in post-production, but you can’t recover lost detail.
Lighting and Depth of Field Interaction
Lighting and DoF are inseparable. To get a shallow DoF, you need a wide aperture. A wide aperture lets in more light, which can expose your image too much. To compensate, you need to reduce light elsewhere.
If you’re shooting outdoors in bright sunlight, you’ll need ND filters to maintain a wide aperture without overexposing. Indoors, you might need to flag off lights or use diffusion to soften shadows, allowing you to open up the lens without blowing out highlights.
Consider the quality of light. Hard light creates strong contrasts, which can enhance the perception of depth. Soft light flattens images, which might work against your goal of separating subject from background. Experiment with backlighting to create rim light on your subject, further separating them from the blurred background.
Conclusion: Intent Over Technique
Depth of field and focus are technical skills, but their application is artistic. Don’t just use shallow DoF because it looks cinematic. Use it because it isolates the character. Don’t use deep focus because it’s hard to achieve. Use it because the context matters.
Every time you adjust your aperture or pull focus, ask yourself: "What do I want the audience to feel?" If the answer is clear, your technique will follow. Master these tools, and you’ll stop taking pictures. You’ll start telling stories.
What is the best aperture for portrait shots in film?
There is no single "best" aperture, but f/1.8 to f/2.8 is commonly used for portraits to create a pleasing separation between the subject and background. This range provides enough shallow depth of field to blur distractions while keeping the entire face in focus, assuming you are using a standard lens like 50mm or 85mm.
How do I achieve deep focus on a small budget?
To achieve deep focus, use a smaller aperture (f/8 or higher). This requires more light. On a budget, shoot during midday when natural light is abundant, or use reflectors to bounce sunlight onto your subjects. Wide-angle lenses also help maintain depth of field compared to telephoto lenses.
Why does my background look blurry even when I’m not trying to make it so?
This usually happens if you are using a long focal length lens, standing very close to your subject, or using a wide aperture. All three factors reduce depth of field. To fix it, zoom out, step back, or increase your f-stop number.
What is the difference between depth of field and focus?
Focus refers to the specific point in space that is sharpest. Depth of field is the range of distance around that point that appears acceptably sharp. You set the focus point, and the depth of field determines how much area in front of and behind that point remains clear.
Can I change depth of field in post-production?
Yes, but with limitations. Software like After Effects or DaVinci Resolve allows you to simulate blur or sharpen specific areas. However, artificial blur rarely looks as natural as optical blur from a lens. It’s always better to get the correct depth of field in-camera.
How do I avoid accidental focus pulls during a static shot?
Ensure your focus ring is locked or secured. Use a follow focus system with a tight gear ratio. Double-check your focus marks before rolling. If the actor moves slightly, anticipate the movement and adjust beforehand rather than reacting during the take.
Does sensor size affect depth of field?
Yes. Larger sensors (like full-frame) produce shallower depth of field compared to smaller sensors (like Micro Four Thirds) when using equivalent fields of view and apertures. This is why smartphone photos often appear deeper in focus than DSLR shots.